
In this guide, we are going to go over how to select an audio source for your Chromebook.
For starters:
- Click on the lower right menu. This is located where the number 1 arrow is in the screenshot below.
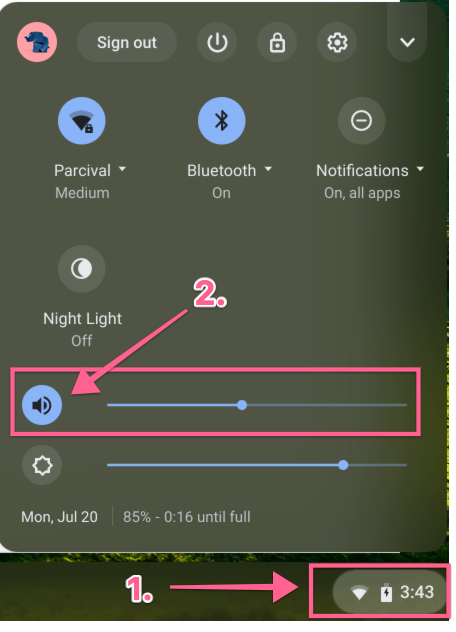
The number 2 arrow in the screenshot is where you can raise or lower the volume of your audio. Your Chromebook comes with default speakers, which is where the sound will automatically transfer through. - On the side of your Chromebook is where you can plugin headphones through either a headphone jack or a USB port.
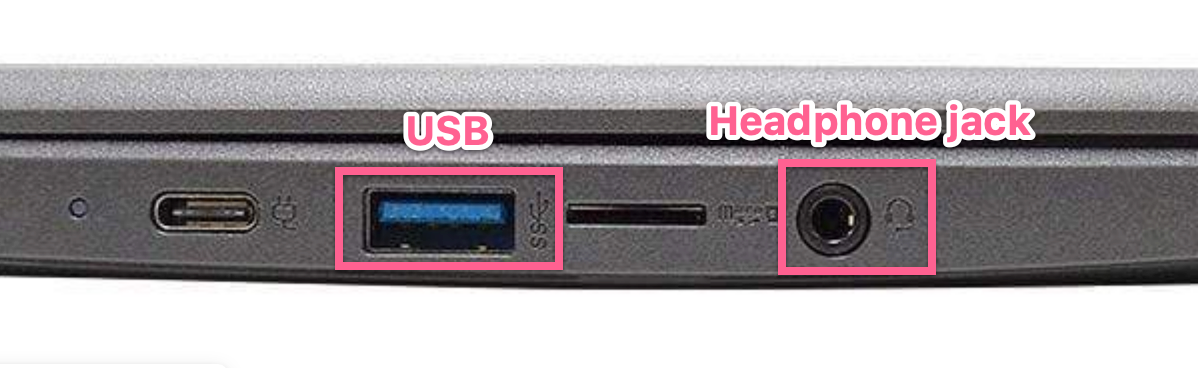
The sound should automatically switch from the default speakers to the headphones. - Some headphones use Bluetooth. To set this up with your Chromebook, click the lower right menu and click "Bluetooth".
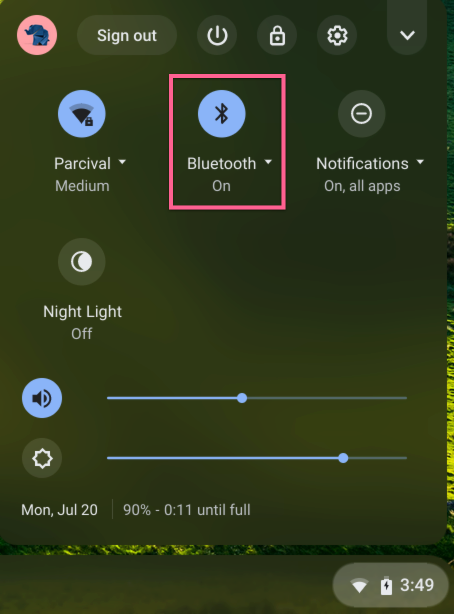
Make sure that "Bluetooth" is set to "On". - Once you click on "Bluetooth", it'll automatically begin searching for devices to pair. Once you see your device's name pop up, select it.
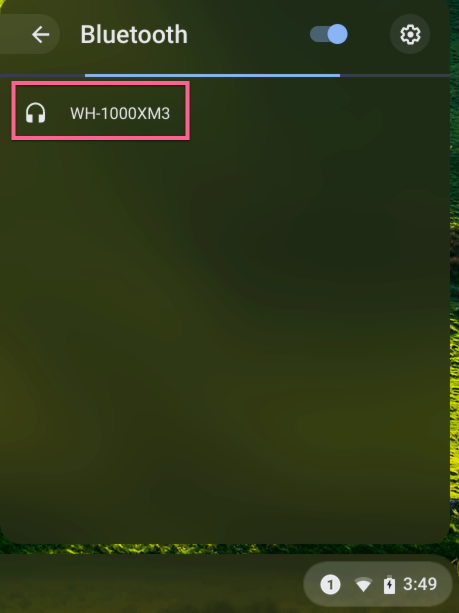
If you don't see your headphone device name pop up after the Bluetooth search, make sure that your current headphone device isn't already connected to a different device. If it is, it will not show up in your Chromebook. You will know if your device has successfully paired with your Chromebook once you receive this message: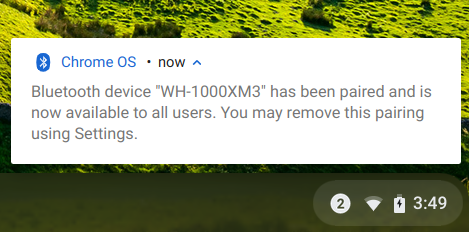
To switch back to the default speakers, click on the lower right menu and click on "Bluetooth". From there, click on the "Settings" icon as shown in the screenshot below.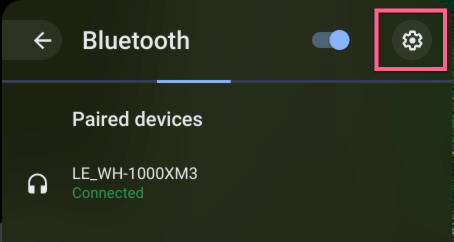
Next, click on the "More actions" icon to the right of your paired headphone device.
Then, click "Disconnect" to disconnect the paired headphone device from your Chromebook.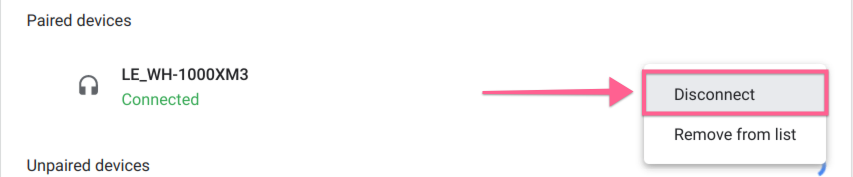
Once you've disconnected your headphone device from your Chromebook, you will automatically be put back into your default Chromebook audio speakers.
And that's all there is to it!
If you are still having trouble selecting an audio source from your Chromebook, don't hesitate to contact support.