Now that you have your ORCA Chromebook, you can set up certain peripherals like a mouse, stylus, or customize the trackpad to work a bit better for you! Below are some common peripherals and what you might run into when setting them up.
Wireless Mouse
This comes in two different flavors, a wireless mouse with a USB plug that connects to your computer or a wireless mouse that works completely over Bluetooth.
Mouse with USB connector
If your mouse is already paired with the USB connector, you can plug it in directly to any available USB port on your Chromebook. Once it's plugged in, turn on the mouse -- there's normally an On/Off switch on the bottom of the mouse. You should be good to go!
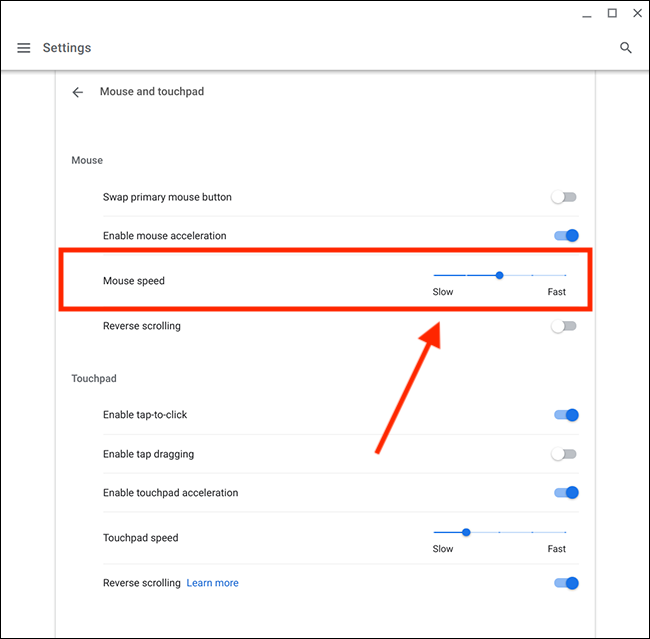
If you'd like to change some of the mouse settings further, you can always adjust this in the settings menu by doing the following:
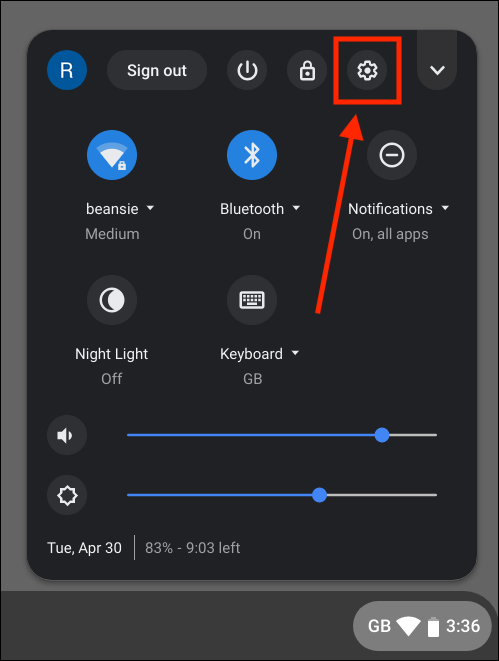
- Open the settings menu by clicking on the clock and choosing the gear icon
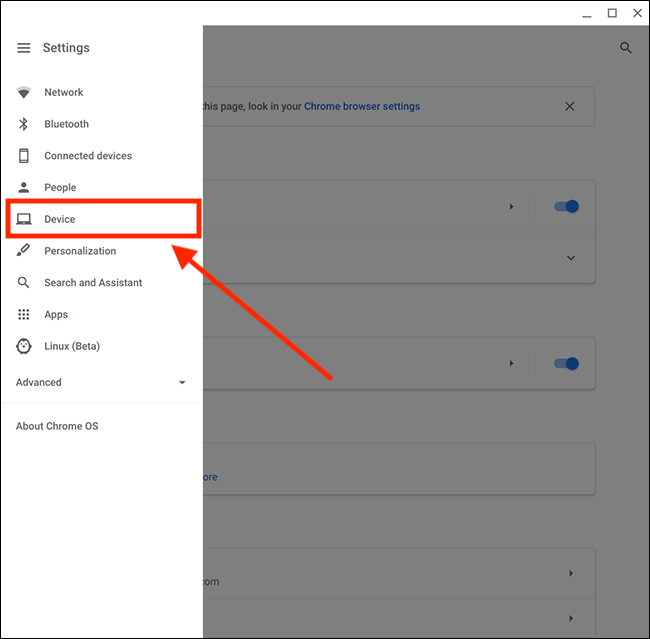
- Choose Device from the left hand menu
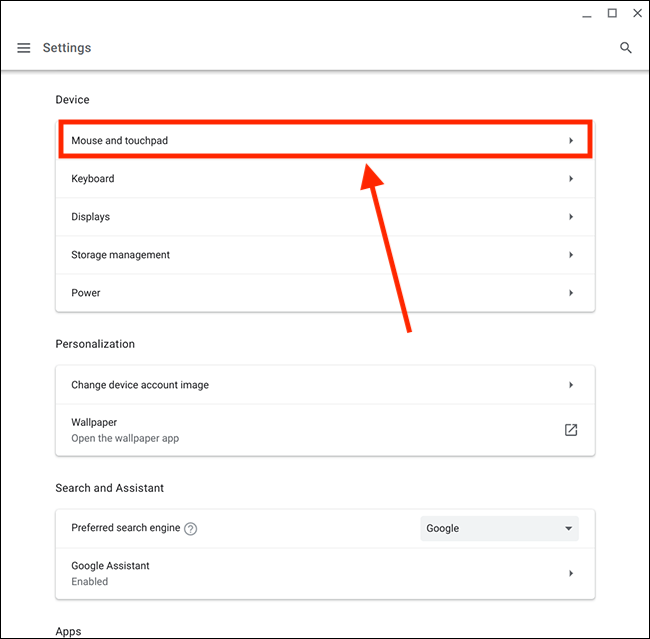
- Choose Mouse and Touchpad
- Adjust the speed on the slider until you're comfortable
Known problems
- If your mouse is not already paired or requires specific software to pair, you may need to do this on another computer.
- Make sure that your battery is charged up, otherwise your mouse may not pick up your movements.
- Some wireless mice have difficulty if there are too many devices using the same frequency and may need to be fairly close to get a signal.
Stylus
While the Chromebook that you're using is not a touchscreen, you can still use a stylus to help draw or navigate! You can do this by moving the stylus around on the trackpad of your Chromebook. If you do decide to use a stylus, we recommend changing some settings to the trackpad to make it a bit more easy to use.
Some of these settings are:
Known problems
- If your trackpad is dirty or wet, your stylus will not be picked up as easily, much like a finger. Keeping your Chromebook clean will prevent this.
- If your Chromebook is not showing a cursor, you won't be able to navigate with your stylus. You can fix this either by doing a drumroll on your trackpad for ten seconds with your fingers or rebooting.
Drawing tablet
Drawing tablets are a great accessory to, well, draw! That said, they won't work completely with your Chromebook as they don't have all of the software that a full computer would. You can still plug it in over USB as you would expect, but you may not be able to adjust the size settings, sensitivity, or any other options on your Chromebook.
Known problems
- No or limited ability to adjust any settings for the tablet
- Not fully compatible with Chromebooks as the expected software can't run on these devices
- Using a drawing tablet can take up a lot of additional resources from your Chromebook which may lead to applications crashing
Creating a more accessible touchpad
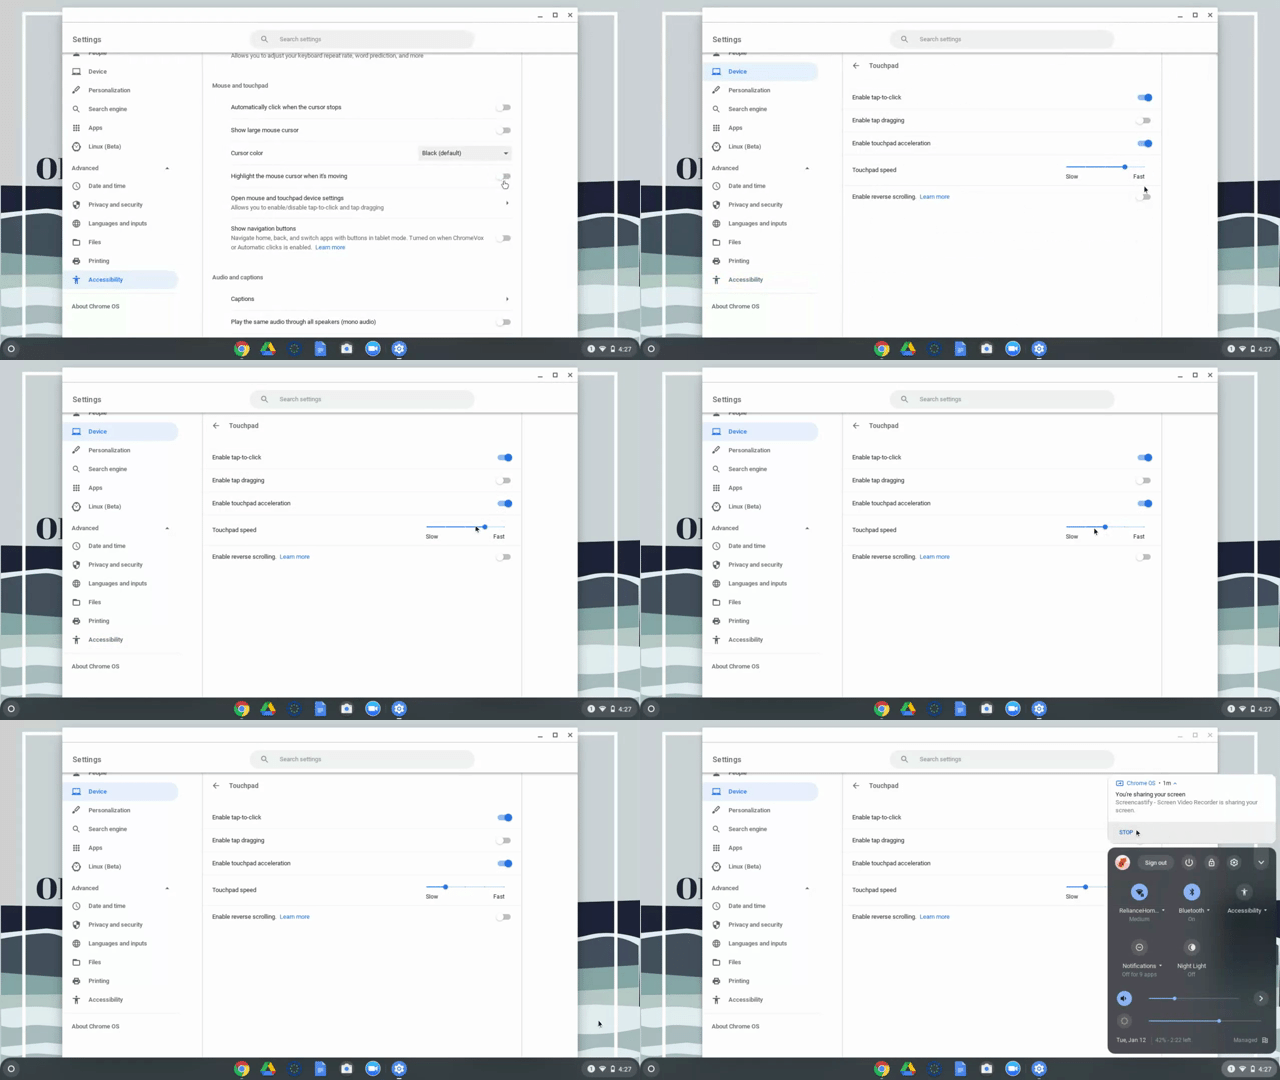
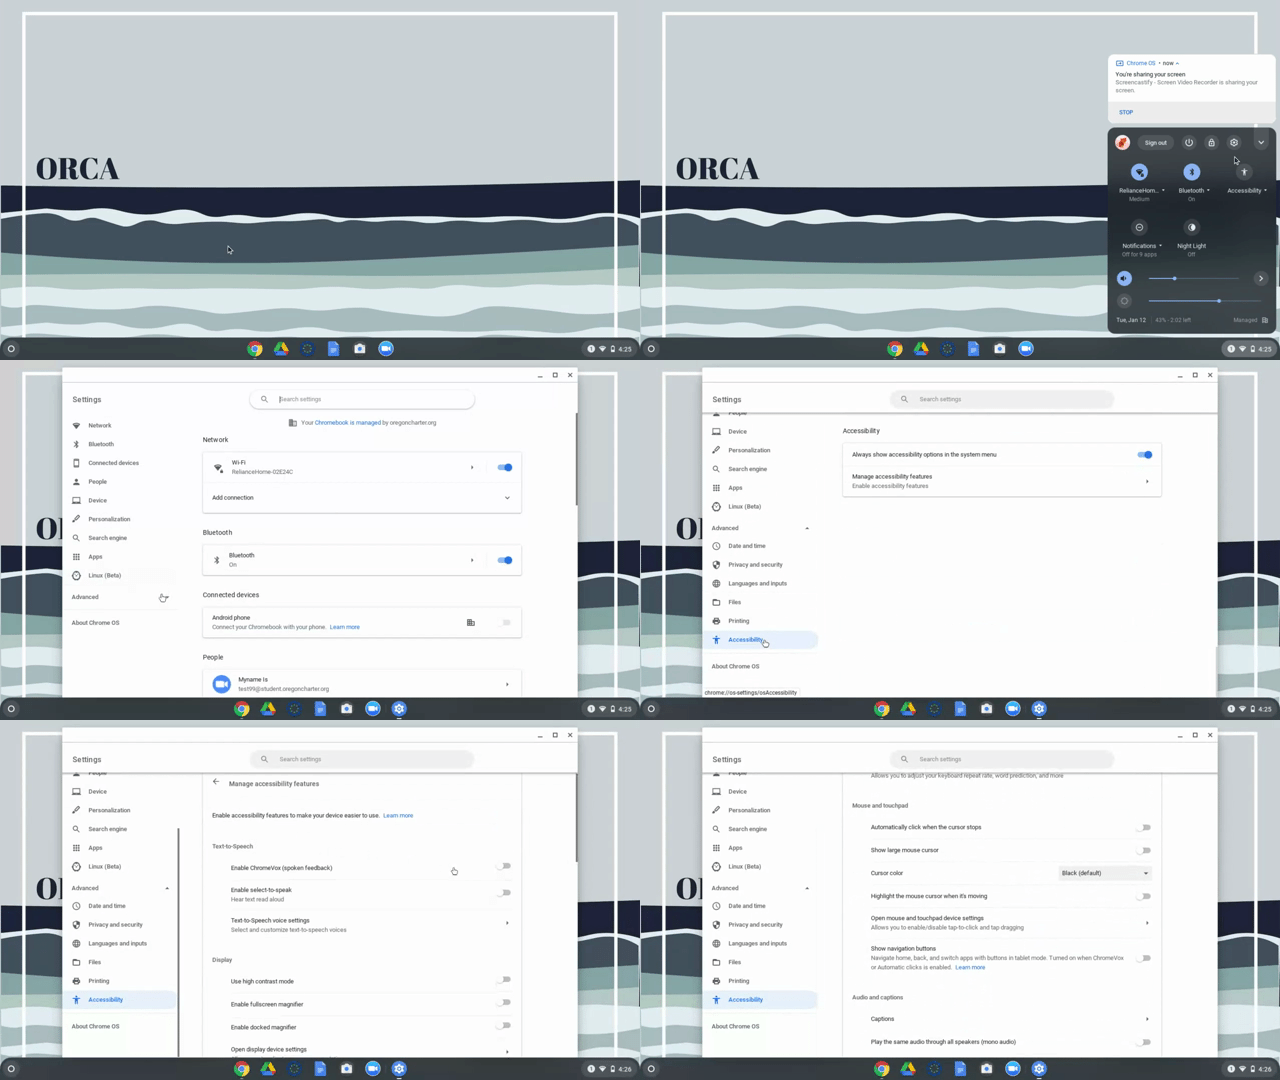
Your Chromebook has a few settings that you might not be aware of that would make using the mouse a bit easier. Follow along below to enable them! All of these settings can be found by taking the following steps:
- Click on the clock and choose the gear icon
- Choose Advanced from the left side of the screen
- Choose Accessibility and select Manage accessibility features
- Scroll down to the Mouse and Touchpad section
Hover to click
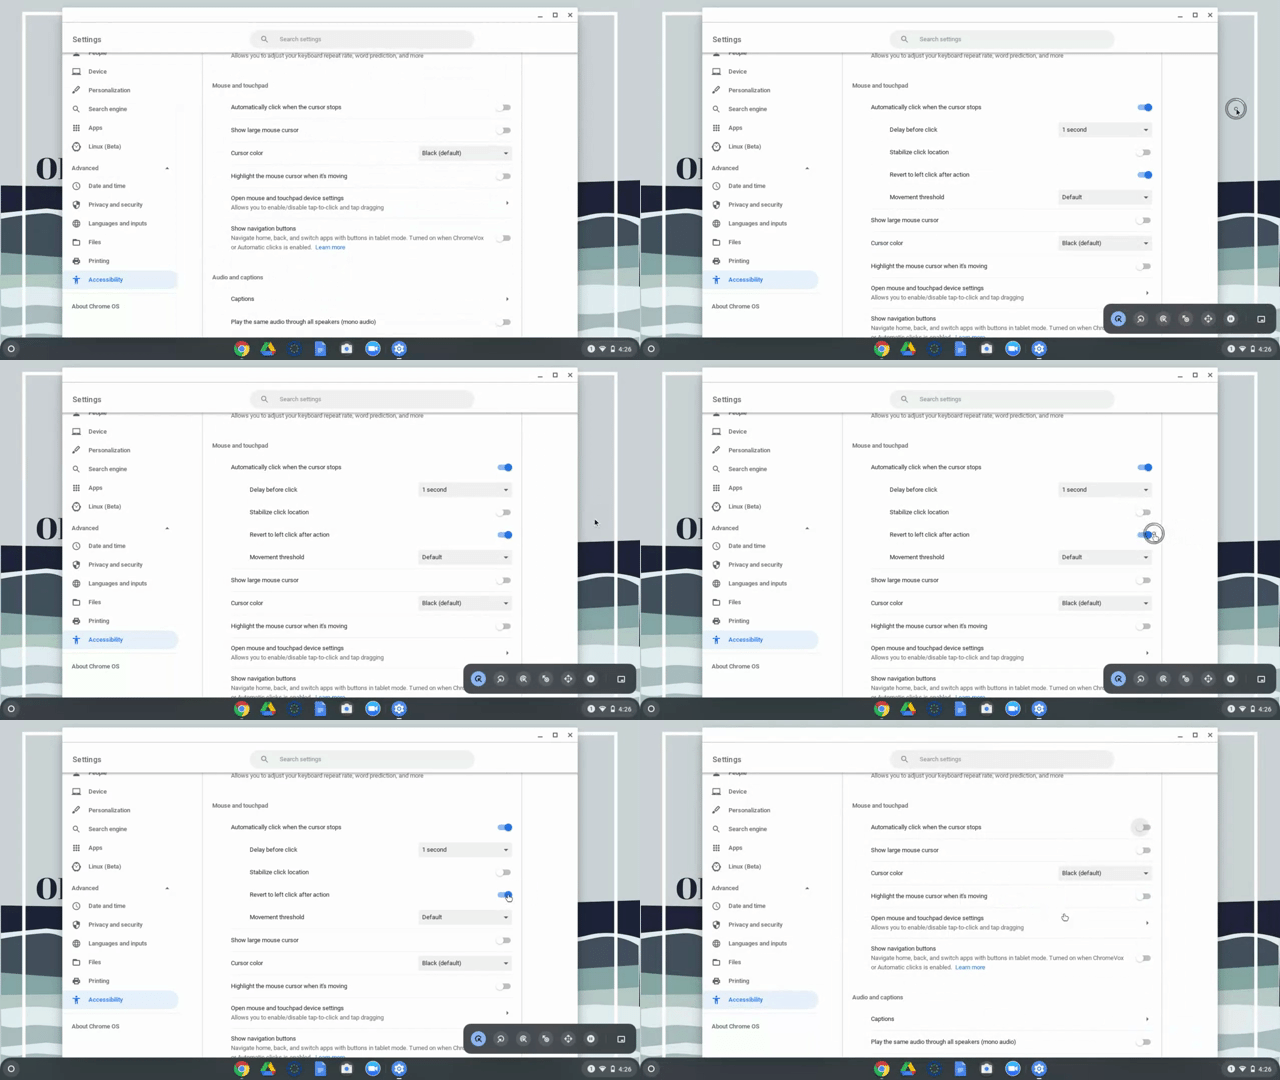
When enabled, a single left-click of the mouse is simulated each time the mouse pointer stops moving. Use the drop-down menu to specify the time interval between the mouse pointer stopping and the click taking place. It is broken down into the following durations: extremely short, very short (default), short, long, and very long.
Increase the size of the cursor
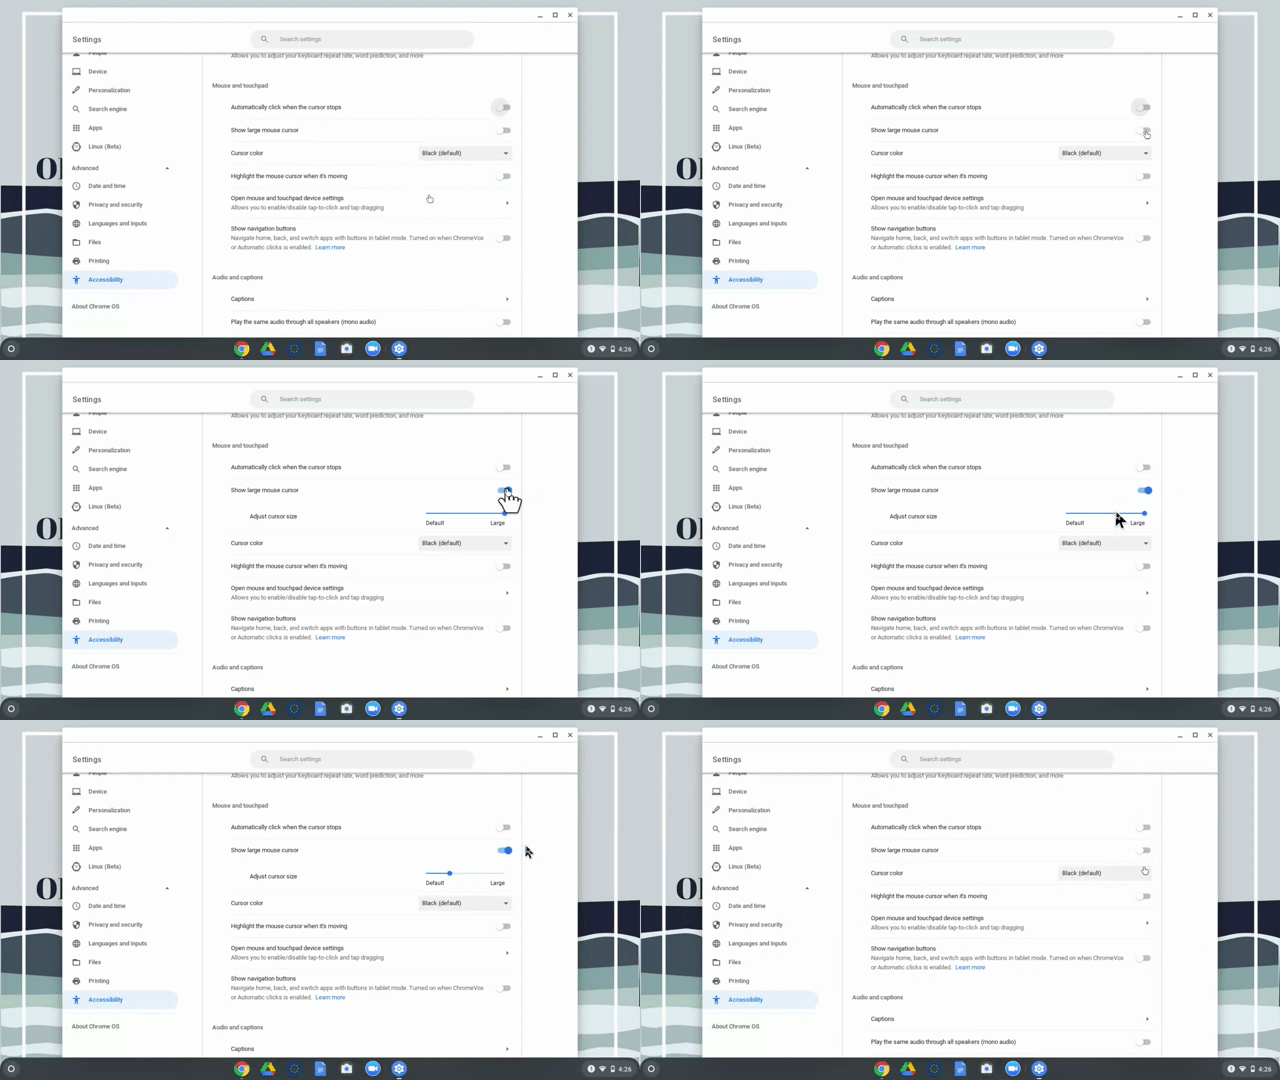
When enabled, the Chromebook's mouse cursor appears several times larger than its default size.
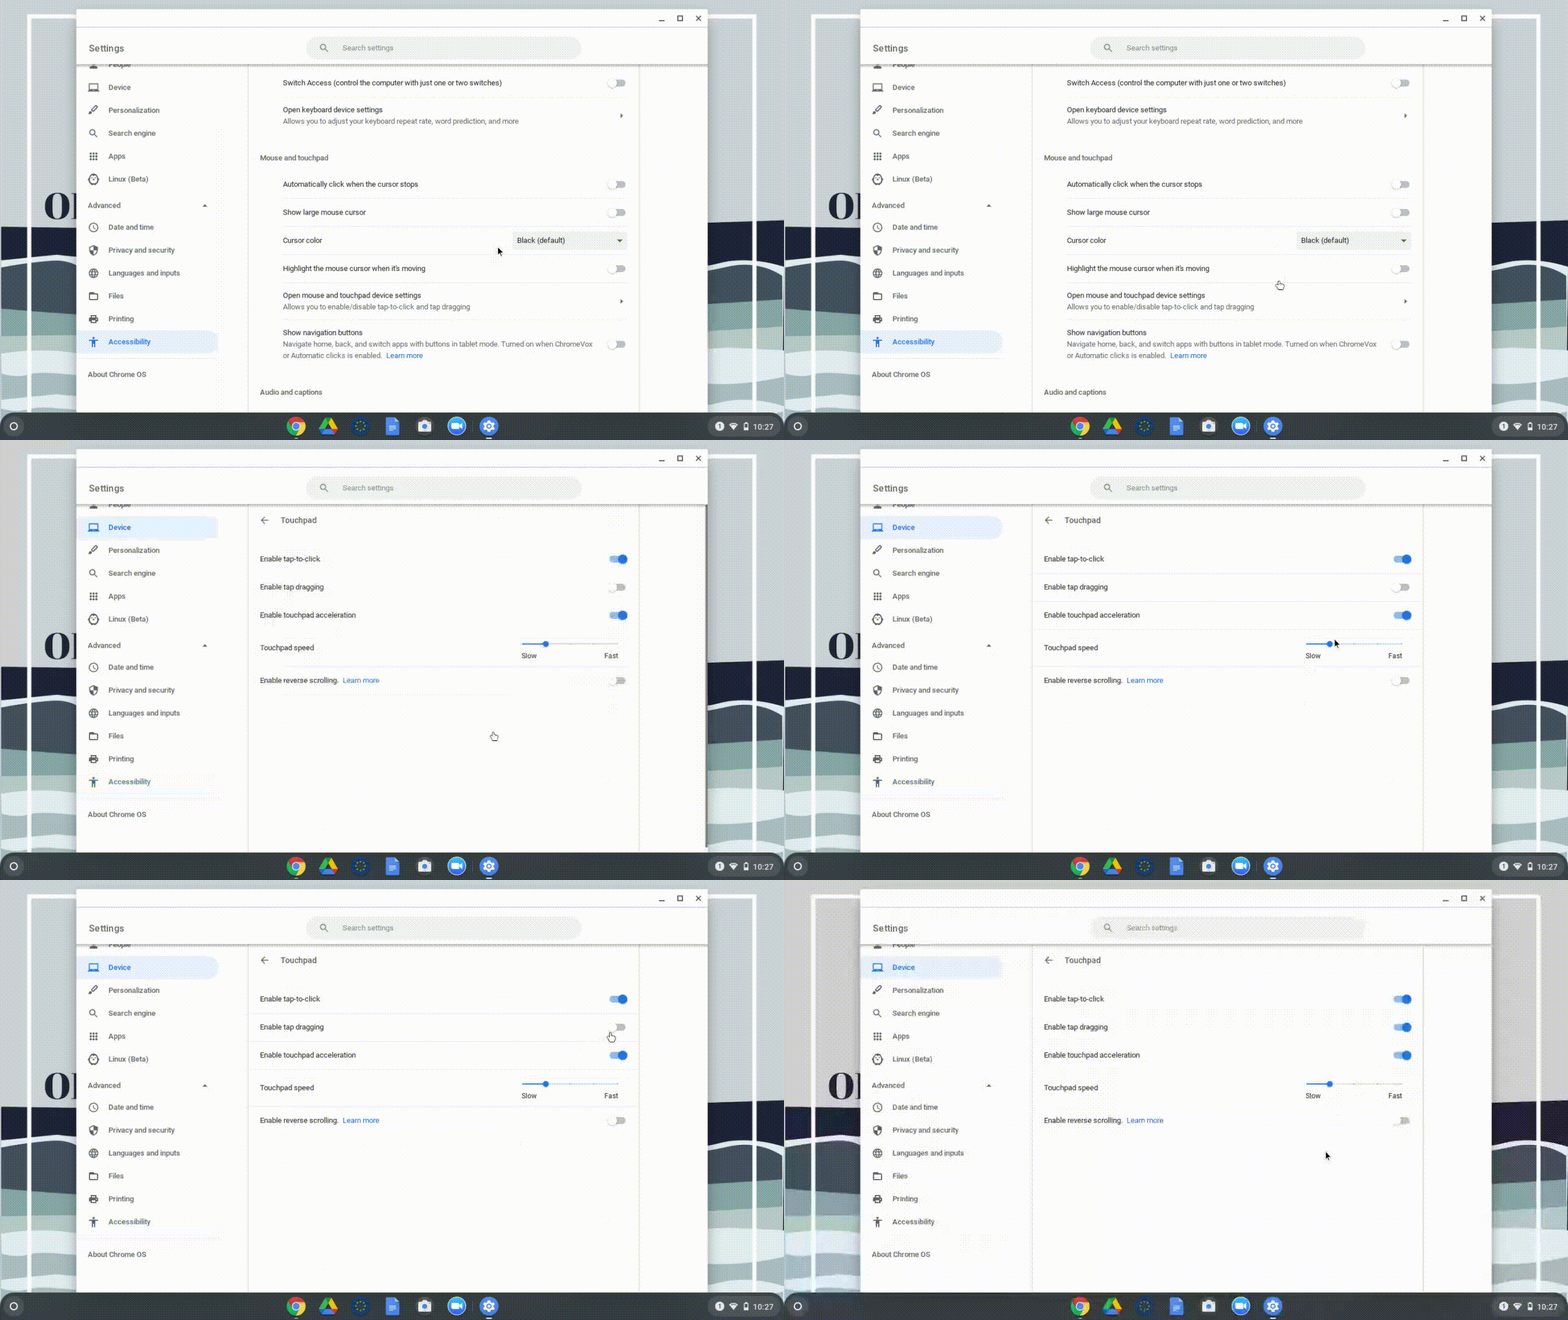
Tap to drag
Tap to drag allows you to use tap-to-select, double-tap the object and hold, then drag it to move.
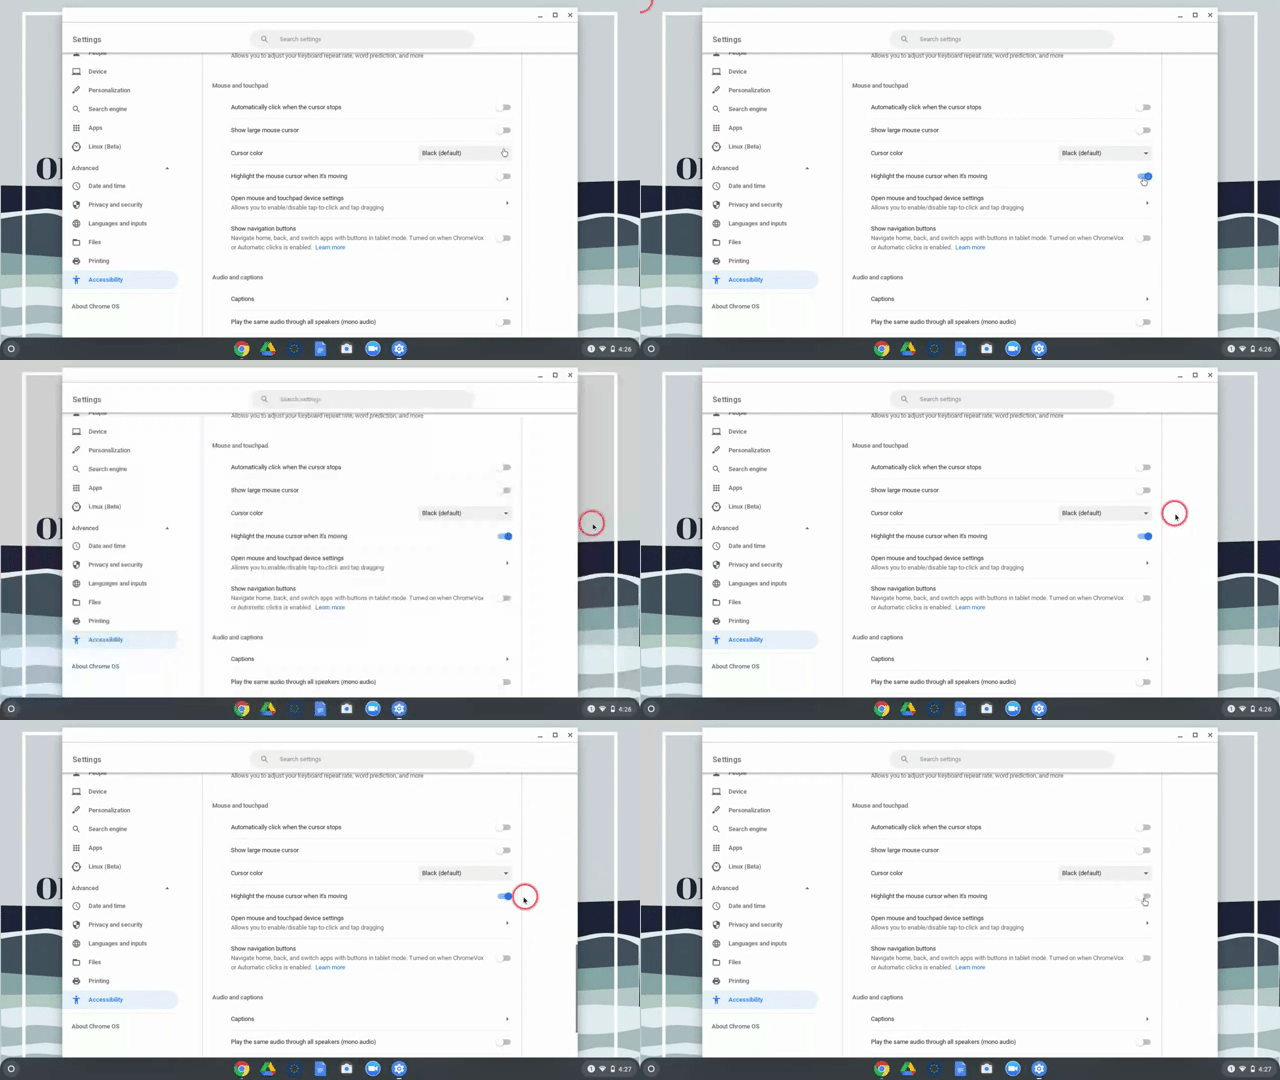
Highlight the cursor
A red circle appears around the pointer, making it easier to see and follow.
Change the speed of the cursor
Choosing the Open mouse and touchpad settings allows you to set how fast the cursor will move around the screen.